Photobucket Photobucket Photobucket Photobucket Photobucket Photobucket

Tuesday, January 4, 2011

Thanksgiving Turkeys


Ya, pretend it's still Thanksgiving. Without overeating again. Without having to rush to finish Christmas shopping. Just for a minute let's take a glimpse back to my November.

We made these little chocolate covered rice krispie turkeys. I didn't really like plain old rice krispie treats but covered in chocolate makes me want to gobble them up. OH, and I did!

I made these twice. Once with my daughters preschool and then again with my nieces. I think they are easier to eat when they are flat but look more like a turkey in the ball form.

The carnage.

I made two batches of rice krispies, spread thin onto one cookie sheet. Enough to make at least 10 turkeys. Cut them out with a round biscuit cutter. Then I dipped them in the chocolate. I used melting chips flavored like chocolate. Much easier than using a double boiler or trying melt chocolate chips in the microwave. Once they're covered, stick them on wax paper or greased plate and pop them in the freezer. They'll dry in 1 minute and then they are ready to eat. I wouldn't suggest storing them in the freezer because they get really hard. Enjoy!

Print Friendly and PDF

Sunday, January 2, 2011

The richest, creamiest, most unhealthy but totally worth it Hot Chocolate!


This recipe is from my friend Rhonda. Thanks for sharing this addictive drink!

Washington Husky famous night before the big game Hot Chocolate

5 cups of whole milk

1 ¼ cup of heavy whipping cream

1 ¼ cup half and half

1 cup Hershey chocolate syrup

1 cup Swiss miss hot chocolate mix

2 Hershey chocolate bars

Dump all ingredients into a large pot, set on stove top and set the temp to medium. Stir frequently and bring to simmer. Simmer and stir for about 30 to 45 minutes. Whip up some heavy cream and add a touch of peppermint extract and drink with a candy cane! Enjoy!

Print Friendly and PDF

Monday, December 13, 2010

Double Chocolate Mint or Peppermint Cookies


This is a new holiday favorite recipe, or two really. I dreamed about making these for weeks before I had a legitimate reason to make them!!!! And, oh, were they worth the wait!

Seriously.

Divine.

Peppermint Kiss Double Chocolate Chip Cookie
&
Mint Truffle Kiss Double Chocolate Chip & Mint M&M Cookie


+


OR


=


OR


Here's how to create these Christmas goodies!

Use my Ultimate Chocolate Chip cookie base and either add Peppermint Hershey's kisses to the top OR add mint m&m's plus mint truffle Hershey's kisses to the top. Or just follow the recipe below. It's one recipe that can be made into two variations, Mint Chocolate Chip or Peppermint Chocolate Chip cookies. If you want to try both you can make the batter until you get to the last three ingredients. Divide the dough, add mint extract/chips/kisses to half and the peppermint extract/chips/kisses to the second half.

Ultimate Double Chocolate Chip Cookie base
(same cookie base as my double chocolate chip recipe)
Yield: 36 cookies

Pre-heat oven to 350 degrees

Ingredients:
1 cup butter, softened--almost melted
1 1/2 cups white sugar
2 eggs
1 tsp vanilla
1 1/2 tsp peppermint or mint extract, dependent on your chip/kiss flavor
1/2 tsp baking soda
1/2 tsp salt
2 cups flour
2/3 cup cocoa
1 cups semi-sweet chocolate chips
36 Hershey's kisses, peppermint candy or mint chocolate varieties OR Ande's mints, halved
1 1/2 cup Andes mint OR peppermint chips OR Andes chopped candies (either mint or peppermint, depending on which you make. Mint chips  for the mint cookie/Peppermint for the peppermint kiss version)**See Note


Directions:
1. Cream softened butter and sugar w/wooden spoon (a hand mixer or standing mixer works well too, I just like to use the spoon, seems to make a better texture). Butter should be very soft. If you did not set it out before hand to reach room temp then place in a bowl and microwave for 30 seconds.
2. Add eggs.
3. Mix in salt, vanilla and baking soda.
4.  Mix in flour.
5. Mix in cocoa.
6. Fold in chips and/or M&M's.
7.Bake for 8-10 minutes. DO NOT OVER BAKE!
8. Once baked and taken from the oven, let them set on cookie sheet for 5 minutes, they will continue cooking and setting. This keeps them nice and gooey for days. Seriously, they are the perfect softness. If they are cooked for the perfect amount of time they will be firm enough to hold but gooey enough without being raw.
9. After they have rested on the cookie sheet, gently remove (they still might be soft) them and place on cooling rack.
10. After they've cooled for at least another 5 minutes on the rack THEN you can gently push the unwrapped kiss of your choice onto the cookie. Let them sit without disturbing or you may end up with a melted kiss. If you are giving them away or taking them to a party, cook ahead of time! If you disturb or move these around before they are completely cool, they can break or the kisses will melt or collapse a bit. Believe me, they're worth the wait!!!!

**VARIATION: for the mint truffle Hershey kiss cookies, you can use mint M&M's OR Andes mints OR mint chocolate chips.  The M&M's were a bit bigger than I expected and I think the Andes chips would not have been so cumbersome. Just use what you have on hand because either one is delicious!

Store in airtight container. Enjoy!

Print Friendly and PDF

Monday, December 6, 2010

Shutterly plug

I wanted to give a little plug to Shutterfly. I've been using Shutterfly since 2002! I have been pleased with their wide variety of products. From their photo development (our photo collage wall photos were developed from Shutterfly) to their photo books to photo cards. I recently accrued enough Pampers "Gifts to Grow" points (mostly using codes for free points found online) to receive a free 8"x8" photo book! Gotta love free stuff!

When my first daughter was born we created a photo card announcement (similar to these) to send out to family. I've previously made a hardback cover 8"x8" photo book and love it! I've also made calendars for my parents.

Here a few designs that I can't decide to make for a Christmas photo card this year! There are way too many to choose from! I personally like the ones that you can add one or more photos to, because I can never decide which photos to choose.

Click on the photo for a link.

I like this simple yet bold black, white, green and red design. I like the black and white photos with the simple red and green. This is a flat photo card.


These colors match better with our family photos.


But I also like their folded cards like this one.


But then I like the simple look of this single photo like this one with the simple message.


I really just love the photo for this one!

Whichever I choose I want to get 5x7" size because it can easily be framed and doesn't need to be cropped!


Which to choose? So many choices....! Print Friendly and PDF

Wednesday, October 27, 2010

Halloween party

I threw a little Halloween party for my kids and their cousins. I did have grand and glorious plans of making a lot more food and decorating a bit more...but I spent too much time on the internet browsing recipes and ideas that I never actually got to executing them all. A lot of inspiration came from this cool website (seriously check out their Halloween food ideas) and from Martha Stewart.

Did you know that dry ice sublimates? In other words, vanishes? I bought some 2 days in advance, you know, thinking I was doing well with planning ahead. The store people kept in a plastic bag and then inside a paper bag and I took it home (with the windows close, which is also a safety hazard...but I wasn't going very far) and stuck it in my freezer right away. The morning of the party I go get the ice and it's gone! The bag is completely lightless and there are frozen fuzzy crystals everywhere. It disappeared! $4 wasted! I had no idea it would disappear in the freezer!!! Tyler laughed at me for not knowing. haha. So our witches brew was just root beer (thank you Emily!).


Handmade banner and ghosts in the background.


The cupcakes using this recipe. And some cupcake flags, of course!

Place markers found on someone this blog who got the idea from Martha. I was really excited about these. And the kids loved them too!

The food table. Notice no "brewing" action going on. And that is my son's sword. He thought it would be cool to add to the photo.

Horrible shadowy picture, does not do justice. Blah. Bat tree inspiration from Martha.

The table. Pizza was served (and not pictured).

I wanted to make these but ran out of time....so we had them on Monday night instead. These little mummy men. And actually, I am learning that not a lot of kids actually like to eat these. At least, not in my family.


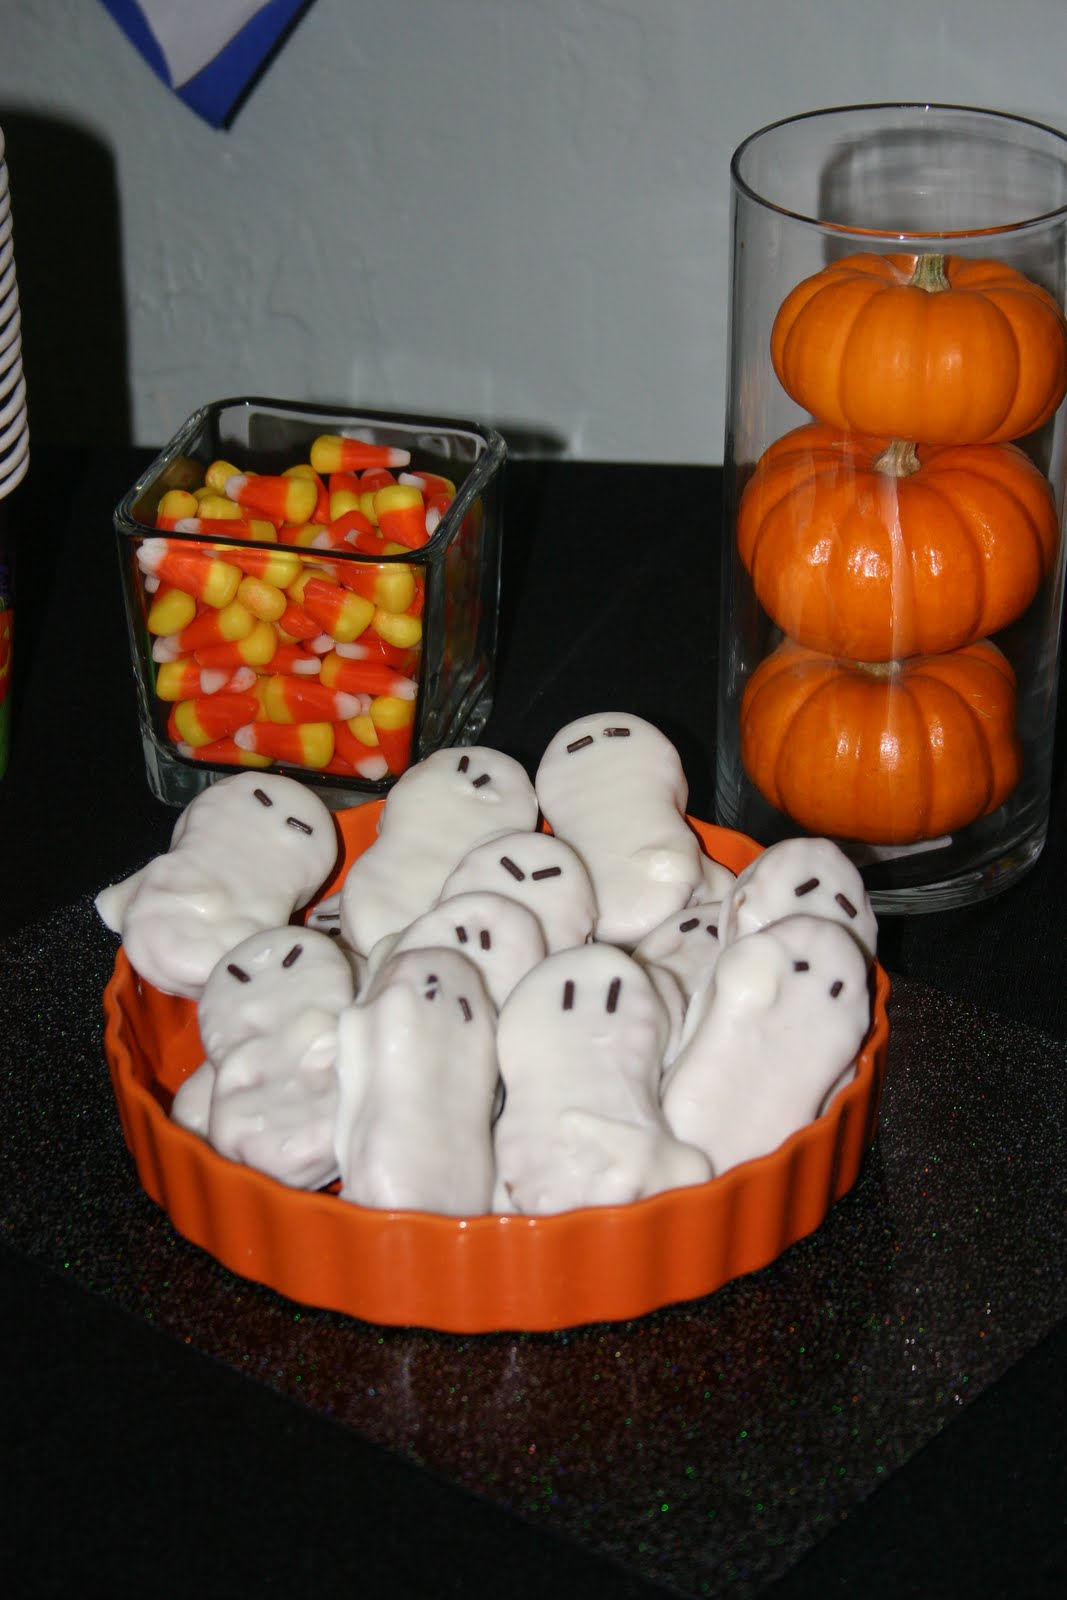
Ghost cookies (nutter butters covered in almond bark).


The decorated pumpkins. They had fun with this. 3D, washable, glittery Elmer's glue.

Print Friendly and PDF

Halloween Decor

I decorated for the first time this season. It gets us all in the season and excited for this pagan holiday!

Floating felt bats in doorway inspired by my cousin Sarah Jane here


Fabric Halloween countdown chain


Pennant buntings (you can buy it here!)

Garbage bag ghost garland

Pillow slipcovers. I made these covers to reuse my existing couch pillows. I used velcro so I can just take them off and make some Christmas ones! And they're washable. I got this great pillow silhouette idea from my cousin Sascha. I found the cat template here and the spider web is just clip art. Each is made of felt and $1 store kitchen linens. The cat is sewn on and the web is ironed and sewn on for extra stability.


The bat tree inspired from Martha Stewart here. Spray painted dead branch with hanging felt bats.

The vase is filled with beans and these poisonous little orange berries; loosely inspired by Tiff.

Floating garbage bag ghosts


Happy Halloween!
Print Friendly and PDF

Monday, October 18, 2010

Recipe of the Week


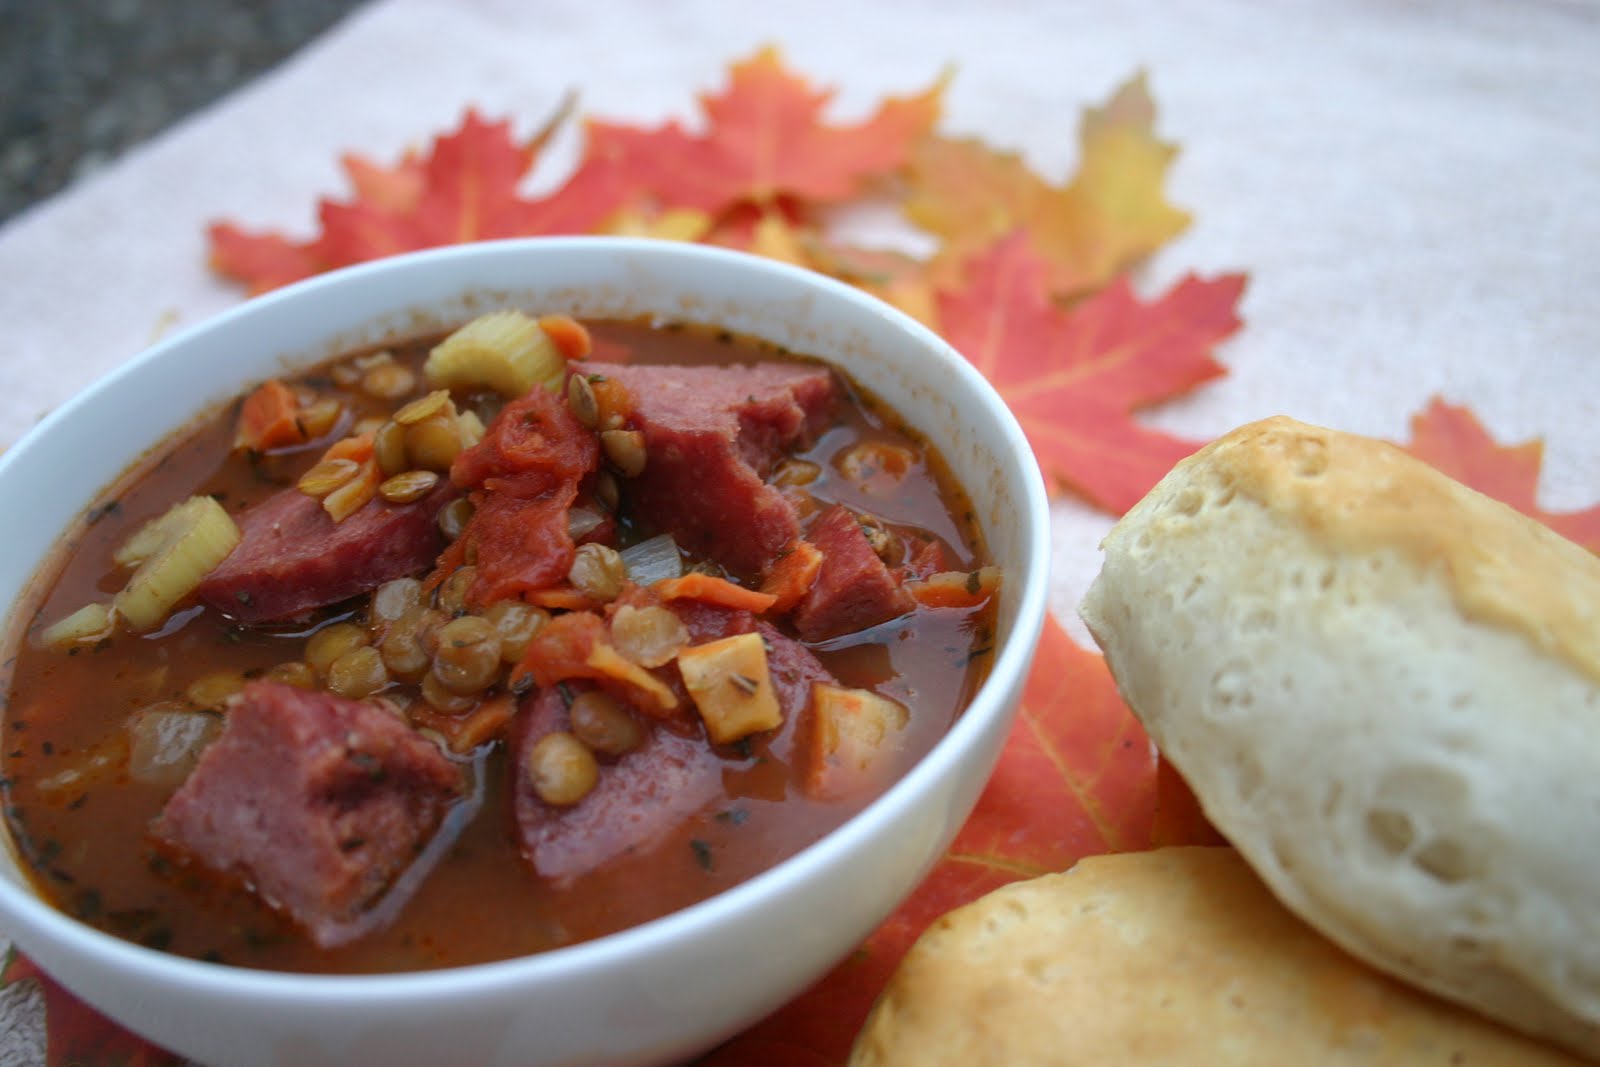
Lentil Soup

My mom gave me this recipe before I left for college. She called it Greek but I don't know how accurate that is. I've made it countless times I finally have it memorized. I've been wanting to post it for a long while but never took any appetizing pictures of it....until now. It's one of my favorites because it's easy, quick, delicious, hearty, healthy and the kids gobble it up! The beans are small and less daunting for children. The only complaint my son offers is for the tomatoes which I let him pick out, if they are big enough for him to notice. Perfect meal for this crisp weather. If you'd like it more like a stew than a soup, just add more of the dry ingredients (veggies, not including tomatoes, lentils and a bit more water). Great for freezing as well!

Ingredients:

Enough olive oil to cover medium sized stew pot.
1 garlic clove, minced
1 medium onion, chopped
1 carrot, sliced
1 celery stalk, sliced
2 cans stewed tomatoes, with juices
1 Cup dried lentils, preferably washed
4 cups chicken or beef broth
1 cup water
1 ham bone with a little meat left on the bone
OR 1 sliced link of kielbasa or polish sausage, or Venison sausage because I had it on hand
1 bay leaf
1/2 tsp dried oregano
1/2 tsp dried thyme
salt and pepper to taste


Directions:

Saute onion until clear. Add garlic until aromatic. Add carrots and celery. Saute until softened. About 5-10 minutes. If using ham bone, place in pot now. Add water. Add tomatoes, broth and lentils. Add seasonings. Bring to boil. Then turn down to medium-low and simmer for about 35 minutes, or until lentils are soft. If you are using sausage add that the last 10 minutes of simmering. If using ham bone, cut off any excess ham from bone, remove it and the bay leaf before serving.

Enjoy!

Print Friendly and PDF