




Photobucket Photobucket Photobucket Photobucket Photobucket Photobucket
Showing posts with label recipe of the week. Show all posts

Tuesday, August 30, 2011

Chocolate Zucchini Bread

Zucchini Bread: Your kids will never know it's "good" for them!

This is a re-post, but worth repeating. Do you have too many zucchini from your garden? Do you neglect to pick them before they grow too large and bitter like me? Then use them for zucchini bread. This recipe came from my mother-in-law and it very delicious.....seriously good. The best I've ever tried. You can't taste the zucchini which is why my kids and I love it! And with the added glaze it's like you're eating cake!
3 eggs, beaten
1 C white sugar
1 C brown sugar
3 tsp vanilla
1 tsp salt
1 tsp baking soda
3 tsp cinnamon
3/4 tsp nutmeg
1/4 tsp baking powder
3 C flour
1 C canola oil
2 C zucchini

Glaze: Make a thin powdered sugar glaze and add some cinnamon.

Pre-heat oven to 350 degrees. Grease and flour 3 regular sized loaf pans or 1 large and 4 mini pans. Set aside.

First add oil plus chopped (doesn't have to be peeled. It's extra fiber. And it's pureed so it doesn't affect the texture but you can be if you prefer) zucchini into blender. Blend until smooth. Make sure it equals 3 cups. Add more zucchini until it is so.
Next, beat eggs, sugars and vanilla together. Add zucchini/oil mixture to egg mixture. Mix. Add remaining ingredients. Pour evenly into pans.

Bake for 1 hour or until toothpick inserted comes out clean. Cool 10 minutes before removing from pan. Cool on wire rack.

VARIATIONS:
Lemon Zucchini Bread

1/2 tsp grated lemon rind
1 C chopped nuts

Omit cinnamon and nutmeg and add lemon rind and nuts.
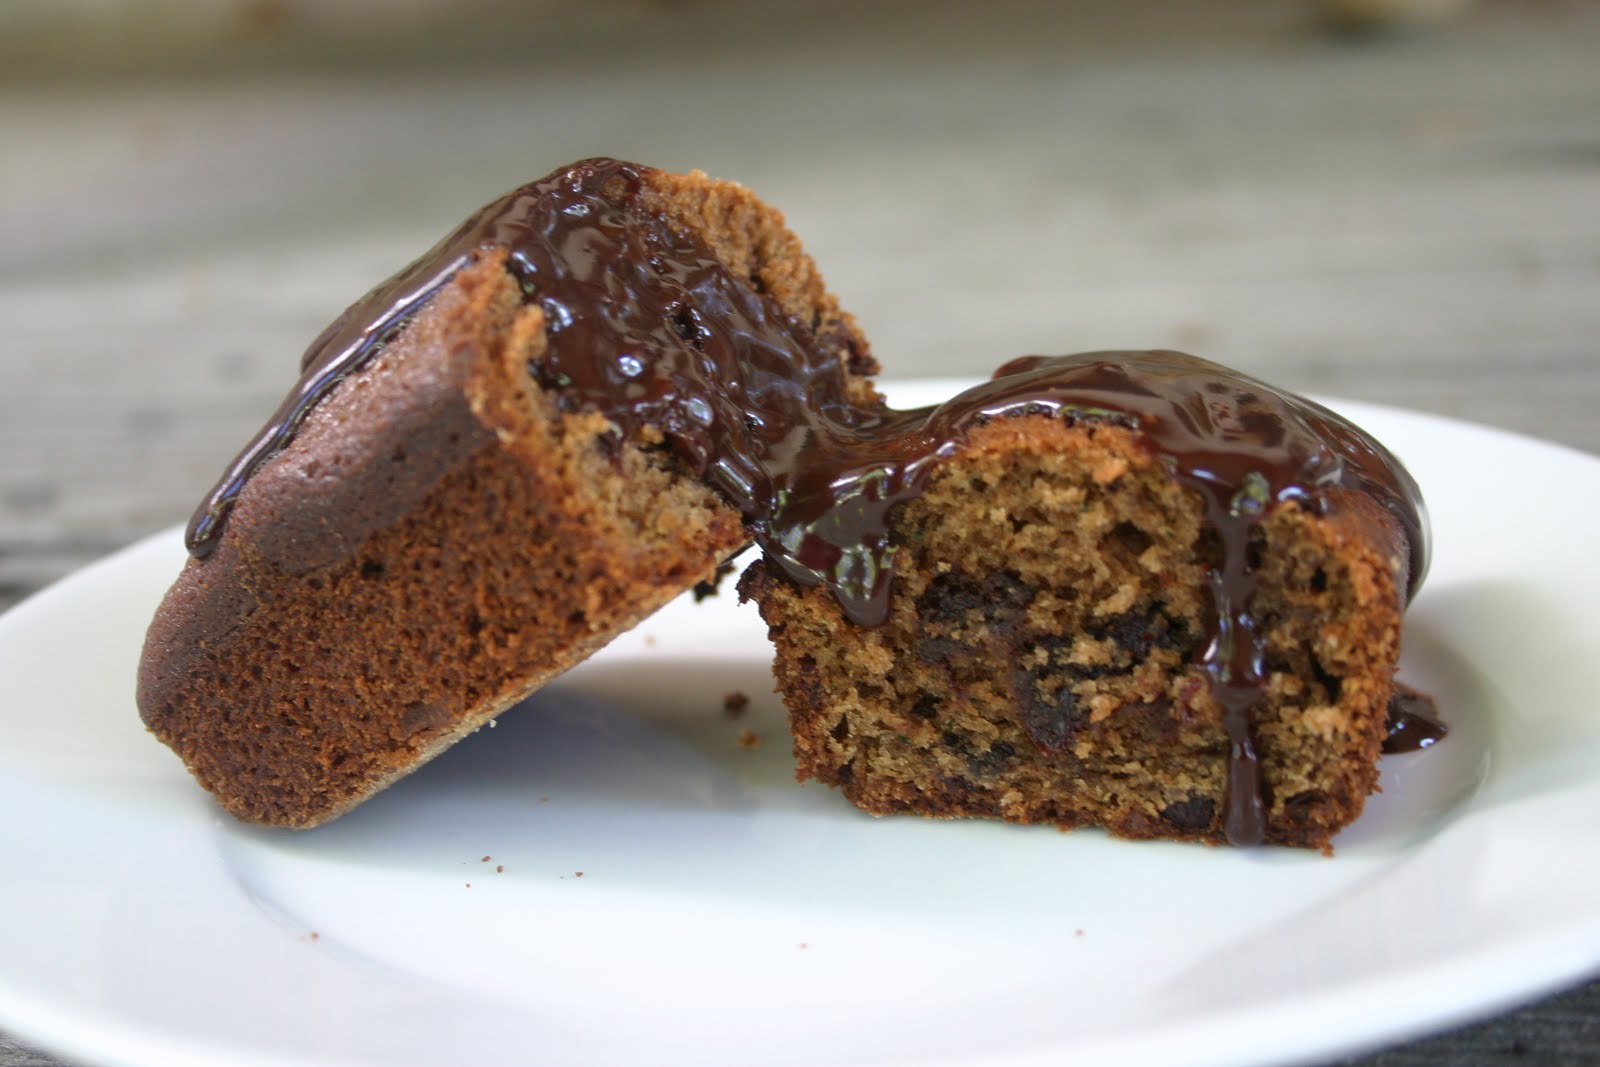

Chocolate Zucchini Bread (pictured)

3 Tbsp cocoa
1 C chocolate chips

Omit cinnamon and nutmeg and add cocoa and chips.

Chocolate glaze:
In a double boiler melt 1/2 C chocolate chips with 1 Tbsp butter plus 5 Tbsp water. Stir until melted.

Off heat add:
1/2 C powdered sugar
1/4 tsp vanilla
pinch of salt

Wait until loaves are slightly cooled before glazing.


TO FREEZE:
You can freeze the oil/zucchini blended mixture in a quart sized freezer ziploc bag. Freeze flat. Thaw completely and prepare as normal.

OR you may freeze cooled cooked loaves with glazes. Wrap in saran wrap and then foil.

Enjoy!

Print Friendly and PDF

Sunday, March 20, 2011

Quick and Easy Homemade Rolls


Sounds like a pretty impressive title? Do you believe me? Well, check out the recipe, make them for yourself and you'll see that not only are these some of the easiest and quickest from-scratch rolls, they're delicious too! This recipe is from a family friend from Colorado. They are made, start to finish, in 50 minutes. No kidding.


Ready? 

Quick Rolls or 50 minute rolls
Yield: 24

Ingredients:
1 cup milk
1 cup water
1/3 cup sugar
1 tsp salt
2 Tbsp yeast
5 cups flour

Directions:
1. Turn on water to heat up to yeast rising temperature (about 115 degrees). Measure yeast (if not using quick rise yeast) into small bowl. Fill bowl with 1 cup water. Let sit and dissolve while you complete the next two steps.
2. Microwave milk in a small pyrex or other microwavable bowl until just bubbling, about 2 minutes.
3. In a large bowl mix dry ingredients together with a wooden spoon.
4. Add warm milk and warm water and yeast to other ingredients. Mix with wooden spoon until combined.
5. Knead into a ball, using the wooden spoon. If you need to, work it into a ball with your hands, but usually I just stir it in right in the bowl until it forms a ball (you don't need a floured surface for this one!).
6. Cover and quick raise in a warm place for 15 minutes. **
7. Remove bowl. Punch dough. Knead again.
8. Rise another 5 minutes.
9. Form balls and just schlop them onto a greased cookie sheet. They don't need to look pretty. If you'd like, you may add some sesame seeds to the top for extra flavor. See the photo for a few varieties. The "schloped" type, rolled ball type and clover leaf.
10. Rise in warm place for 15 minutes.
11. Bake at 400 degrees for 10-15 minutes!
12. Rub with butter as soon as they come out of the oven.

Did you do the math? Let me do it for you:
15 + 5 + 15 + 15 =50 minutes!

**TIP, I normally heat up my oven to the 170 degrees (or lowest your oven will go) and then turn it off and open the door for a few minutes to let some air out. I place the bowl inside the warm (but not too hot!) oven to rise if you are using a plastic bowl, make sure the oven is not too hot that it will melt your bowl! OR if your oven is in use put it in a warm microwave. Turn the micro on for about 1 minute (after it's already been heated up by warming the milk) and rise it in the microwave. Just don't forget it's in there and turn it on!

Enjoy! Print Friendly and PDF

Friday, March 18, 2011

Rainbow Cupcakes

Rainbow Cupcakes

Pretty fun, eh? I found this recipe form Our Best Bites. I really like their blog and use of practical tips for their recipes. They're a great resource for my menu. This particular recipe is a great base for any white cupcake. It's dense and moist, just like I like them to be!


And you take a bit, and voila! Color! Fun! Magic! It feels like you're eating a rainbow even though you're really not! One of these times when I makes these I'll try to flavor each color. But that would taste interesting....


The cool swirl frosting technique!


I highly recommend that you use Wilton's gel dyes instead of food coloring because you'll get a much more vibrant color and effect. These were a great addition to our St Patrick's Day (week) desserts. I think they'd also be a great addition to a carnival birthday party!

I have to admit that I made mine way too top heavy I filled mine with tablespoons of color instead of teaspoons like they suggest below so I ran out of space for the last two colors so you can barely see the blue and green peeking at the top. So really when I ate one it was really like eating two. And sometimes, twice in one day. Oops! :)
Rainbow Cupcakes
From Our Best Bites

1 white cake mix
2 eggs
1 C yogurt or sour cream
1/2 C milk
1/3 C vegetable oil
Combine all ingredients until incorporated (about 30 seconds). Scrape sides of bowl and then beat on med-high speed for 2 minutes.
Divide batter according to how many colors you are using. I used 5 colors and it worked out to a little over 1 cup for each color, but each cake brand will be slightly different.
Use food coloring to color batter to desired intensity.
To get a layered stripe like I used, you’ll want to put a spoonful of each color in the cupcake one at a time. The batter is thick, so it won’t spread on it’s own. A great tip is to set out a little bowl of water where you’re working. Dip your finger in the water and then gently spread the batter out. The water will make it so the batter doesn’t stick to your fingers.
Another tip is to use a measuring spoon and some water to measure out how many teaspoons/tablespoons are going to fit in your cupcake. Then divide that by how many colors you have so you know how much of each color to use for each cupcake. For my 5 colors, it worked out perfectly with 2 t of each color in each cupcake. So I put in 2 t of blue in the bottom of each cupcake and spread it out with my finger. Then I put in 2 t of green on top of that, then yellow, etc.
Bake them according to the package directions, until a toothpick comes out dry. "

The Frosting recipe I used is Wilton's buttercream, my new favorite frosting recipe because it doesn't taste too buttery and it's nicely thick and creamy. I used Our Best Bites frosting suggestion found here. You essentially paint a stripe, with the food gel of every color inside your piping bag before filling with frosting. Then frost as normal but it comes out in a cool rainbow swirl! Here is a photo of their technique.

What occasion would you make these cupcakes for? Print Friendly and PDF

Thursday, March 17, 2011

Green Eggs and Ham and Lucky Charms


This is only the second year I've attempted to make green eggs and ham for St. Patrick's Day morning breakfast. And today I played short order cook for my family, but it was fun! I know my 6 year old son only likes eggs in the boiled form, so he got to eat a bowl of Lucky Charms. Sadly, the book did not have enough clout to influence his palate. But his lucky charms were extra special today because they were in green milk with green sugar sprinkles.


My husband thought this recipe was horribly salty. And I had to agree. It had a nice creamy texture and it didn't feel like we were eating raw eggs (because if you don't add the butter at the right temp, it can be). But next time, if I try this very quick and easy version again, I'll omit most of the salt.

I added a little extra butter to my husband's eggs, because, well, he can afford the extra calories unless like some of us in the house :)


What you see: Whole Wheat English Muffin (because I like to try to be healthy), fried egg, 1 slice Canadian bacon, Eggs Benedict dyed green.


Happy St Patrick's Day!

Tomorrow I'll post the last of this holiday series with rainbow cupcakes!

Print Friendly and PDF

Friday, March 11, 2011

Pesto Pasta--St Patrick's Day Recipe 3


The first time I tried basil pesto sauce I got sick and consequently threw it up. It took a long time before I was willing to try it again. But once I discovered how delicious it is on Panini's I have since been reconverted to it, even more so after trying this recipe.

I found this recipe on Food Network by the Barefoot Contessa and tweaked it a bit by substituting some of the mayo for sour cream, adjusting the type of pasta and adding chicken.

Pesto Pasta
Yield: 12 servings

Ingredients:
1 1/2 pounds bow tie, fusilli, or any other combination of past
1/4 cup good olive oil
1 1/2 cups pesto (packaged or see recipe here)
1 cup frozen chopped spinach, thawed and squeezed dry
3 Tbsp freshly squeezed lemon juice
3/4 cups good mayonnaise
3/4 cup sour cream
1/2 cup freshly grated Parmesan
1 1/2 cups frozen peas, defrosted
1/3 cup pine nuts, optional
3/4 teaspoon kosher salt
3/4 teaspoon freshly ground black pepper
1 cup cooked shredded chicken, optional

Directions:

Cook the pasta, separately, if you are combining types of pasta, in a large pot of boiling salted water for 10 to 12 minutes until each pasta is al dente. Drain and toss into a bowl with the olive oil. Cool to room temperature.

In the bowl of a food processor fitted with a steel blade, puree the pesto, spinach, and lemon juice. Add the mayonnaise and sour cream. Puree. Add the pesto mixture to the cooled pasta and then add the Parmesan, chicken, peas, pine nuts (if using), salt, and pepper. Mix well, season to taste, and serve at room temperature.

Enjoy!

Print Friendly and PDF

Thursday, March 10, 2011

White Chicken Chili--St Patrick's Day Recipe 2


Okay, okay. So this recipe is neither green nor Irish. But it has lovely green garnishes and it's fresh in my memory so I thought I would share this recipe with you for St Patrick meal inspiration. And, by the way, I am on a nacho kick lately. Just the basic, melted cheese on delicious tortilla chips (my current favorite are the Organic Kirkland brand from Costco). It's a nice touch to dip them in the stew.

White Chicken Chili--slow cooker style


Ingredients:
3 cans Great Northern beans, drained
2 lbs chicken, pre-cooked, shredded or cubed
1 medium onion, chopped
2-4 1/2 oz cans chopped green chilis
4 cloves garlic, minced
2 tsp cumin
1/2 tsp salt
1 tsp oregano, dried
1 tsp coriander, dried
2-14 1/2 oz can chicken broth
1 cup water
**If you'd like a more soup consistency, add more water.

Garnish:
Sour cream
Cheese
Lime
Cilantro
Nachos or tortilla chips

Directions:
1. Boil or brown chicken. Cube or shred.
2. Add all ingredients into crock-pot and mix.
3. Cook on Low for 10-12 hours or High for 4-6 hours.
4. Garnish with cilantro, sour cream, cheese and lime. Eat with nachos.


Print Friendly and PDF

Wednesday, March 9, 2011

Pesto Quiche--St Patrick's Day Recipe 1


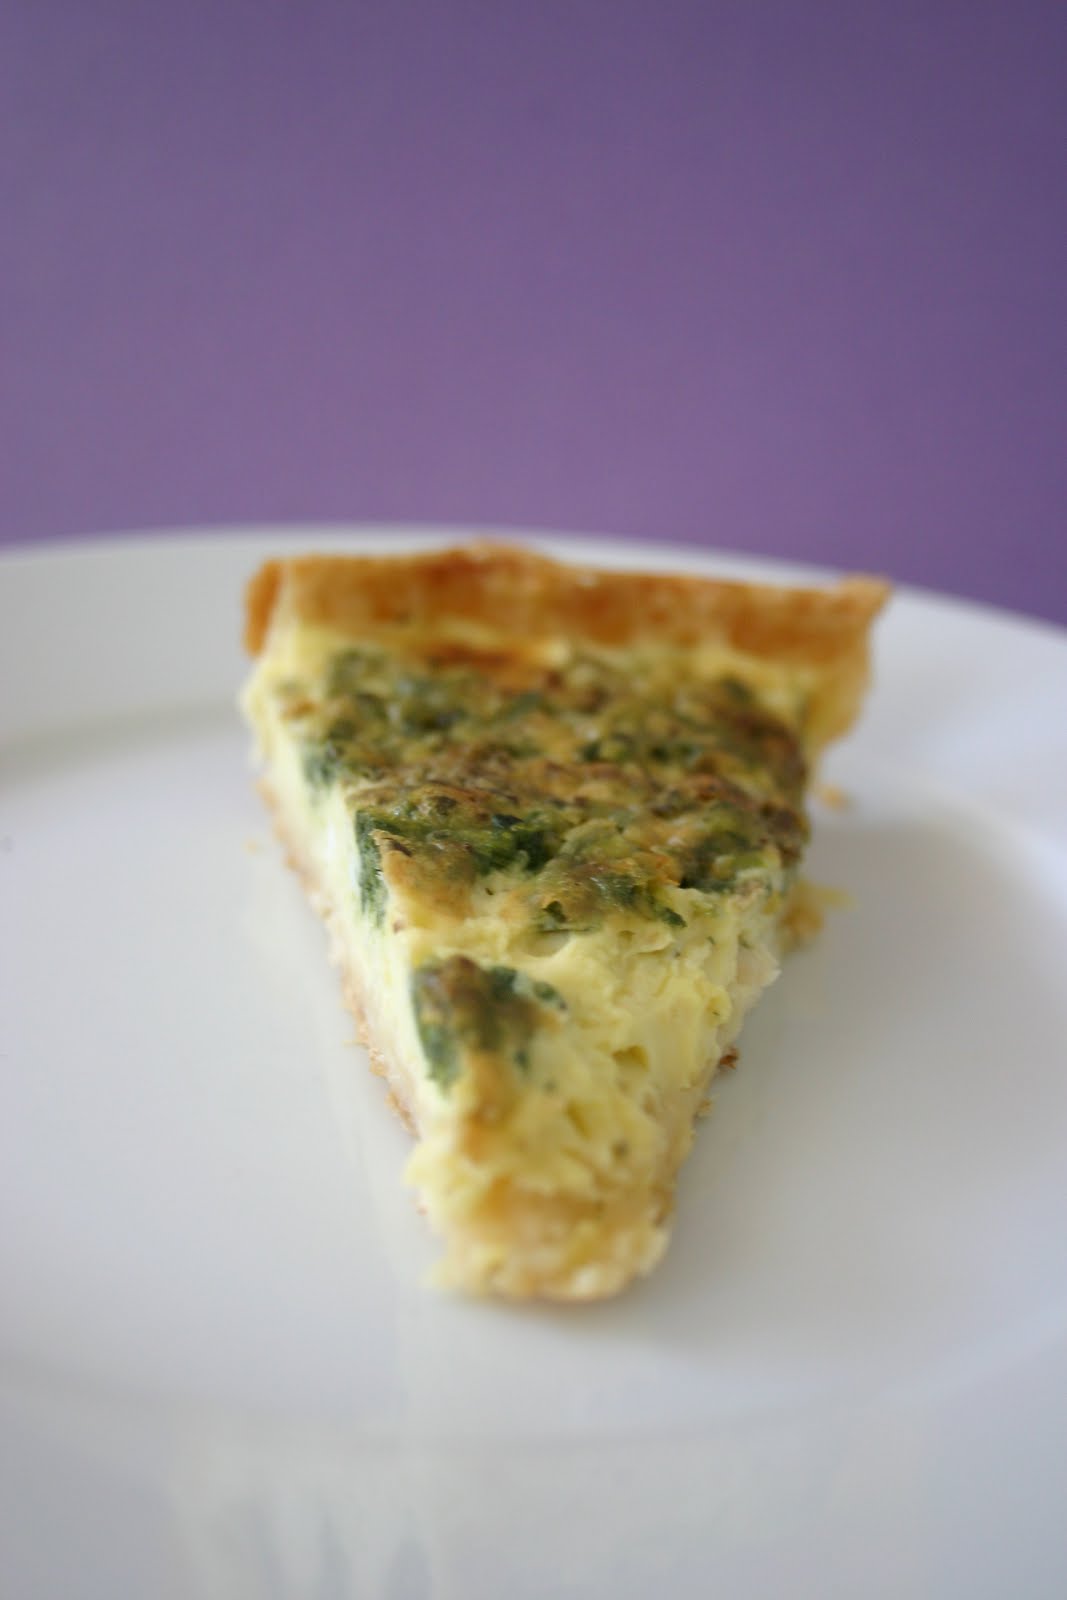
Quiche has been a staple in our family since we lived in Paris 5 years ago. You could buy a Quiche Lorraine in the freezer section at our local market over there, but fresh is always superior. We had some extra pesto sauce left over from a recipe I'll share tomorrow and I thought it would be a nice change to my usual quiche. It can be served with our without the chicken. It can also be served warm for dinner (preferred) or chilled for a brunch or baby shower.

If you don't have a quiche dish or tart pan, simply use a deep pie dish.


Pesto Quiche

Yield: 4 people, 8 servings

Ingredients:
1 pie crust, handmade or store bought (I prefer this easier method)
2 large eggs
2 large egg yolks (save the whites for an omelet, or mousse!)
1 cup milk
1 cup heavy cream
1/2 tsp salt
1/2 tsp white pepper
pinch of ground nutmeg
pinch of dried basil
4 oz cheese, shredded, any kind, preferably swiss
1/4-1/2 cup pesto sauce
1/2 cup frozen chopped spinach, thawed and squeezed dry
1/4 of a chicken breast, chilled and shredded (about 1/2 cup)

Directions:
1. Press crust into quiche dish. Be sure to allow a bit of the dough to overhang the edges a bit, because it will shrink down when baked. Bake at 375 degrees for about 8 minutes, or until just browned.
2. Meanwhile, in a 1 qt glass measuring cup, or a small mixing bowl, combine all ingredients with a fork or whisk, except the chicken, cheese, spinach and pesto. I usually measure out the milk and cream first then add the remaining ingredients. Fewer dishes that way.
3. Once pie crust is done, remove it from oven and add the remaining ingredients.
4. Start with the cheese, spread it over the bottom of the crust. Then top it with the chicken, spreading evenly. There will be gaps or spaces, that's okay. Then add the spinach. Spread the leaves out a bit as you go. Then cover with pesto.
5. Next, pull oven rack out just a bit, and replace quiche dish onto the rack.
6. Gently pour egg mixture into dish, over the other ingredients.
7. Slowly replace oven rack.
8. Bake for 45-60 minutes. Check for doneness after 45 minutes. It is done with the center is no longer jiggly and the top is browning. Or if you a insert a knife near the edge and it comes out clean.
9. Notice the spinach and pesto float to the top. Now you have a "green" meal!

Enjoy!


Print Friendly and PDF

Simple Alfredo Sauce


This is the easiest Alfredo sauce recipe you'll find, other than from a jar. One of my college roommates, Jenny, gave it to me. It was supposedly Olive Garden's recipe, but I doubt that.

Alfredo sauce with pasta is my all time favorite food ever. But my husband.....meh. So I try to make it for others or when he's gone. So today we had a cousin's get together and I made it for them!

Quick, easy and delicious! Just 4 ingredients. You ready?

Simple Alfredo Sauce
yield: 8 servings

You'll need:
1 stick (1/2 cup) butter
1--8oz package cream cheese, room temp (I like to use the neuf-chatel, lower fat, doesn't seem to make a difference in taste, plus you feel a little Swiss eating it :) )
3/4 cup parmesan cheese
1/2-1 C milk

1. Boil some water.
2. Add Pasta. Any kind. About 12 oz. Prepare as usual. In this case I used whole wheat spaghetti.
3. For the sauce, dump these 4 ingredients into a small pot.
4. Start with 1 stick butter. Let it melt for a bit.
5. Add cream cheese.
6. Add parmesan cheese.
7. Add milk. Adjust to the thickness you desire.
8. Combine with a whisk. Stir and bring just to a boil. It will thicken.
9. Do not overcook.
10. Pour over pasta!

You're done!

If you'd like you can always add cubed chicken, bacon crumbles (as pictured), garlic or herbs to give a little extra flavor.

Enjoy!

You could also add a little green food coloring to make for a St Patrick's Day meal. In the next few days I'll be featuring some great St. Patrick's Day recipes! So keep checking back! Print Friendly and PDF

Monday, March 7, 2011

My Birthday Party


Does this tempt you? Delicate lemon cupcake with strawberry buttercream!

I am experimenting with recipes for my upcoming birthday party. Are you ready for the theme?

French Vintage in aqua and pinks! You excited? I am!!! Tomorrow I'll post my inspiration board with some more exciting ideas. But for now enjoy the recipe, especially if you can't join me in my celebration you can try these at home!

Recipes:

Tender Lemon Cupcakes

adapted from Martha Stewart's recipe

Makes 48 mini cupcakes or 24 regular cupcakes

Pre-Heat oven at 350 degrees. Line cupcake tins with wrappers.

12 Tbsp unsalted butter, room temp
2 1/4 cup sifted flour
2 1/4 tsp baking powder
1/4 tsp salt
1 1/2 C sugar
3 large eggs
3/4 C buttermilk
1/2 tsp lemon extract
Zest of one lemon OR 1/2 tsp dried lemon peel

1. Combine flour, baking powder and salt together in a medium bowl. Set aside.
2. With an electric mixer or upright mixer, beat butter on medium-high speed until light and fluffy, about 4 minutes.
3. Add sugar; beat well.
4. Reduce speed to medium; add eggs, one a time, until fully incorporated.
5. Reduce speed to low; alternately add flour and buttermilk, starting and ending with flour. Stir in lemon peel or zest.
6. Pour batter into lined cupcake pan. Bake for 15 minutes for mini cupcakes, or until cake bounces back when gently pressed on. Cool in pan before removing and replacing on a cooling rack.

Sprinkles' Strawberry Frosting
adapted from Sprinkle's recipe found on Martha Stewart

Makes enough to generously frost 1 dozen regular muffins or 24 mini's

1/2 C whole frozen strawberries, thawed
1 C unsalted butter, firm and slightly cold
Pinch of coarse salt
3 1/2 C powdered sugar
1/2 tsp lemon extract

1. Place strawberries in small food processor, process until pureed.
2. Beat together butter and salt on medium speed in a upright mixer, until light and fluffy.
3. Reduce speed and slowly add powdered sugar, beat until well combined.
4. Add lemon extract and 6 tablespoons strawberry puree (save any remaining puree for another use). Mix until well blended. But do not over mix or it will incorporate too much air.

Enjoy! Print Friendly and PDF

Friday, February 25, 2011

Herbed Salmon and Zesty Brown Rice


Ready for a super simple yet delicious salmon recipe? You're in luck! This is one of my favorites! The flavors are subtle enough for kids. Even my husband, who generally doesn't like brown rice , loved this brown rice recipe.

Honey Mustard Basil Salmon & Zesty Brown Rice Salad

2 Large or 4 small Salmon fillets, about 1" thick
2 Tbsp olive oil
2 Tbsp lemon juice
1 Tbsp honey dijon mustard (or 1 Tbsp dijon mustard mixed with 1 tsp honey)
2 garlic cloves, minced
1/4 cup basil, freshly chopped
salt and pepper to taste

Remove any bones with pliers. Place salmon, skin side down, on a cookie sheet. In a small bowl, mix together olive oil, lemon juice, mustard, and garlic. Stir in chopped basil. Season with salt and pepper. Spread mixture over fillets with pastry brush or simply spoon it over and smooth it over until the whole fillet is covered. Let sit and marinate while you prepare the brown rice. If you make ahead of time cover this dish and keep in the fridge.

Pre-heat oven to 375 degrees. Bake for for about 12 minutes or until the fish flakes when scraped with a fork, or thermometer reads 140 degrees.

**TIP: Do NOT overcook. The general rule for fish is 10 minutes per one inch thick fish. So if the fillet is only 1" thick cook for about 10 minutes. If it's 2 inches then cook for about 20 minutes.

**TIP: Did you know you rarely need to skin salmon or halibut? Most of the time we place the fish directly over foil on a cookie sheet, flesh side up, and bake. When it's perfectly cooked, it should "peel" right off the skin that sticks to the foil. Easy clean up and no skin!

Zesty Black Bean and Brown Rice Salad

Shared with me by my friend Mareen
Yield: A lot! 6-7 cups, serves about 10

Combine the following in a large bowl:
6 C brown rice, cooked and cooled
2 15 oz cans black beans, drained and rinsed
2 C corn, fresh, frozen, or canned (drained)
1 C celery, sliced
3/4 C green onion, chopped
2 C tomatoes, chopped
1 bell pepper, red or green, chopped
1/4 C cilantro, chopped

Dressing:
Whisk together the following:
1/4 C red wine vinegar
1/2 C olive oil
2 tsp tabasco sauce
1/2 tsp ground cumin
1 tsp salt (or to taste)
1/2 tsp black pepper
4 Tbsp white sugar (or as desired, to taste)

Pour over rice mixture and combine. It can be served warm or chilled. I think it tastes better chilled.

Enjoy! Print Friendly and PDF

Saturday, February 12, 2011

Oreo's--Valentine's Dessert 4


Homemade Oreo's
Makes about 18 sandwich cookies


Making this recipe is so basic and simple but can easily be dressed up for any holiday or occasion! Plus, it's a great activity to do with your children! There are many recipes floating around the blogosphere. But I chose the simplest version with the cake mix from Tangled and True because I am lazy and cake mix was on sale! I adapted it a bit. But they were a bit greasy so next time I think I'll try the non-cake mix version (she has both on her blog).

Cake Mix Cookie version
1 package devil's food cake mix - Chocolate or German Chocolate (If you are going to use the German chocolate mix be sure to press cookies to slightly flatten then immediately after removing them from the oven - this will insure a perfectly round cookie)
2 eggs
1/2 cup oil (or butter flavored shortening)

Cream filling (enough filling with plenty to spare)
1 stick butter
1 package of cream cheese (8 ounces)
3-4 cups confectioner's sugar (depending on desired consistency)
1 tsp vanilla extract
Food coloring or food gel, optional

Cream butter (about 2 mins). Add cream cheese and mix well. Add confectioner's sugar slowly until you reach your desired consistency. Add vanilla and food coloring, if using. Mix.

Directions:
Pre-Heat oven to 350 degrees.

Mix ingredients with hand mixer until comes to a thick consistency. Now, this is a fun part for your kids to help with, Roll dough into balls (about the size of a ping pong ball, try different sizes for different cutters. I used golf ball sized balls for bigger cutter). Place on lightly greased cookie sheet. Bake for 8-9 minutes. Remove from oven and let cool on sheet (until warm). Remove cookies from sheet and place on cooling rack.

Can you believe I am showing you into my messy kitchen especially with bad lighting? Shock! Well, I am because I am a visual person and like to see some helpful tips :)
If you want shaped cookies then cut them out now. Cut (and eat the scraps as you go along :) ) with cookie cutter and flip over so pretty side is face down. To assemble the cookies, use a pastry bag with any tip you've got (you can always use a zip lock bag with a round tip or just use a butter knife) add about a tablespoon of filling into the center of one cookie. Place the opposite cookie or for rounds one that is similar in size on top of the filling, the nice looking side up, of course. Lightly press, to work the filling evenly to the outsides of the cookie. Continue this process until all the cookies have been sandwiched with cream. Now, if you'd like, roll the cookies gently in a bowl of sprinkles of your choice. Refrigerate. Store cookies in fridge because of the frosting plus they taste better and have a nicer firm look.

And then I went a little crazy with the wonderful lighting...


Print Friendly and PDF

Friday, February 11, 2011

Creme Brulee--Valentine's Dessert 3

Photo compliments to my friend Melissa E
Dessert compliments to my hubby, except the garnish and burning, I did that :)

Classic Crème Brûlée

The French have perfected the art of making desserts. In all their styles of cooking they try to achieve perfection. The best way to achieve this? Contrast. Opposites. This recipe is a prime example of this juxtaposition they love to create. Though the English first "invented" this desset the French came to call it Crème Brûlée, or "cholesterol bombs" as Bo Friberg calls them. Crème Brûlée literally means burnt cream. The cream (creme) is thick, smooth, creamy and chilled. The sugar is "burnt" (brulee), crisp, thin and warm. To eat this dessert you must gently tap on the burnt sugar. You know it's made well if it's not too thick and not soggy! You gently tap on the sugar, break through this "shell" and you are immersed in the creamy luscious cream. You take a bite and you discover the sensation of the crisp bitter sugar and then the smooth sweet vanilla cream. Perfection!

Classic
Crème Brûlée
adapted from two recipes by Cooks Illustrated and Bo Friberg's The Professional Pastry Chef.

Serves 8-10, ramekins like pictured above

1 vanilla bean
2/3 cup granulated sugar
pinch table salt
4 cups heavy cream
12 large egg yolks
1 tsp vanilla extract
extra granulated or turbinado sugar for the burning

1. Adjust oven rack to middle position. Pre-heat oven to 300 degrees.

2. Cut the vanilla bean in half lengthwise and scrape out the seeds. Save the pods for later. Combine the seeds with the sugar, rubbing the sugar mixture lightly with your fingertips to combine. Set aside.

3. Combine 2 cups of the cream, sugar and salt in medium saucepan. Submerge bean pods into mixture and heat just until scalding point over medium heat, stirring occasionally to ensure the sugar dissolves. Take pan off heat and let steep 15 minutes to infuse flavors.

4. Meanwhile, place a rag dish towel (one that normally would use to cover your bread while rising, for example) in bottom of a cookie sheet. Bring a small pan of water to boil. We can fit 8 on our cookie sheet as pictured.

5. After the cream has steeped, remove bean pods and stir in remaining 2 cups cream to cool down mixture. Whisk yolks in large bowl until broken up and combined. Whisk about 1 cup cream mixture into yolks until loosened and combined; Do not whip! repeat with another cup of cream. Add remaining cream and whisk until evenly colored and thoroughly combined. Strain through fine-mesh strainer into 2-quart measuring cup or pitcher (or clean medium bowl); discard solids in strainer. Pour or ladle mixture into ramekins, dividing it evenly. Reserve any extra cream for another baking batch.

6. Carefully place cookie sheet in pre-heated oven. Pour boiling water into pan, without splashing or pouring any water into the empty ramekins. Fill cookie sheet until water reaches 2/3 or 3/4 the way up the ramekin (depending on how deep your dish is). With the oven rack slightly slid out a bit, with the cookie sheet resting on the shelf but not on the edge, do this so the pan does not tip and spill and so you have room to pour into ramekins without burning your hand on the top broiler while trying to pour the custard. Pour the custard into each ramekin. Be sure to fill the ramekins all the way to the top as the custard will settle slightly while cooking. Gently slide oven rack into place and bake.

7. Bake until custard is just barely set and no longer sloshy, between 170 and 175 degrees internally. About 30-35 minutes (25-30 minutes for shallow fluted dishes, like we use). Do NOT overcook as the custard may break and have an unpleasant texture. Do not underbake either as you don't want to serve raw custard.

8. Remove the ramekins from the water bath and transfer to a cooling rack. Cool to room temperature, about 2 hours, and refrigerate until completely chilled.

9. The custards can be stored in the refrigerator for 4-5 days at this point, left in their ramekins, covered tightly with saran wrap. Do NOT store with burnt sugar, it will dissolve and taste very gross and get soggy. Believe me, we've tried this.

10. Presentation. If condensation has collected on custards, place a paper towel on surface to soak up moisture. Sprinkle just enough granulated or turbinado sugar on top of the custard to cover the surface. Clean off any sugar on the edge or outside of the ramekin. Tilt and tap the sugar to cover surface evenly. Caramelize the sugar with a blow torch (purchased at hardware store) or mini torch (purchased at home goods/kitchen appliance store). If you do not have a torch you can place the ramekin directly under a broiler. Burn until dark golden brown, almost black. Until the shell is completely firm and not jellied.

11. Decorate with fresh fruit or enjoy plain! Good luck eating a whole one by yourself! Now you'll never want to buy one for $8 from a restaurant again! It probably won't taste as good as your homemade version anyhow!


Print Friendly and PDF

Thursday, February 10, 2011

Fortune Cookies--Valentine's Dessert 2


Decorated Fortune Cookies


You can either buy your own and create your own sayings and slip them in then decorate. OR you can make your own! I found this idea on Our Best Bites (LOVE that blog). I decided to try my hand at these to give away as gifts to some gals I visit. They are a bit tricky to work but if you follow their directions, I think they turn out pretty good! I used almond extract like they suggested because I love it! When my kids walked into the kitchen as I finished making the batter they asked, "what is that yummy smell?" That, my dear children, is almond. LOVE it!

Be sure to check out the original post to find more helpful tips! I think I made mine a bit too thick because it only yielded about 18 cookies instead of 24.

Homemade Fortune Cookies
adapted from Cooking Light

1/2 C flour- If you have bread flour, use it.
1/2 C sugar
1 tsp vanilla- or sometimes I use 1/2 almond 1/2 vanilla
2 egg whites

Place all ingredients in a food processor and blend to combine. Place in a container and chill 1 hour.

Preheat oven to 400°.

Cover a baking sheet with parchment paper*. Draw 3-4 (3-inch) circles on paper. Turn paper over. Spoon 1 teaspoon batter into center of each of the drawn circles; spread evenly to fill circle. Bake at 400° for 5-6 minutes or until the cookies are brown just around the edges and a little toward the centers. Remove from the oven. Let sit for a few seconds before removing from pan. Working quickly, loosen edges of cookies with a spatula, and turn over.

*Make sure to note the 3 baking methods described in the post above. You might find that one of those works better for you.

Place fortune along the center of 1 cookie. Fold cookie over so the edges meet ; press edges together. Gently pull the ends of the cookie down over the rim of a small bowl (or jar); hold for a few seconds or until set. Repeat procedure with remaining cookies. Makes about 24 cookies.


Print Friendly and PDF

Wednesday, February 9, 2011

Strawberry Tart--Valentine's Dessert 1


Fresh Strawberry Tart

If you are lucky and find fresh and tasty strawberries at this time of year then make this beautiful strawberry tart for your sweetheart! This was one of our favorite treats when we visited the patisseries in Paris. My husband learned how to make one while we lived in Paris from a friend of ours who was studying culinary arts there. Though I made this one pictured, my hubby really perfected the recipe! Believe me, he's made many versions and this is the one we've found works the best. The sweet thick crust combined with the silky cream topped with firm ripe fruit! Perfection!

It's not exactly the easiest recipe but it's worth it!

Pastry: from Cooks Illustrated
Makes one 9- to 9 1/2-inch tart shell
If the dough feels too firm when you’re ready to roll it out, let it stand at room temperature for a few minutes. If, on the other hand, the dough becomes soft and sticky while rolling, don’t hesitate to rechill it until it becomes easier to work with. Better to rechill than to add too much flour, which will damage the delicate, crisp texture of the dough. We find a French rolling pin (as pictured in illustrations) to be the most precise instrument for rolling tart pastry. Bake the tart shell in a 9- to 9 ½-inch tart pan with a removable bottom and fluted sides about 1 to 1 1/8 inches high. This recipe is formally known as Pâte Sucrée.

Ingredients

1 large egg yolk
1 tablespoon heavy cream
1/2 teaspoon vanilla extract
1 1/4 cups flour
2/3 cup confectioners' sugar
1/4 teaspoon
8 tablespoons unsalted butter (1 stick, very cold), cut into twenty-four 3/4-inch cubes
1 tablespoon flour for dusting

Instructions

  1. 1. Whisk together yolk, cream, and vanilla in small bowl; set aside. Pulse to combine 1 1/4 cups flour, sugar, and salt in bowl of food processor fitted with steel blade. Scatter butter pieces over flour mixture; pulse to cut butter into flour until mixture resembles coarse meal, about fifteen 1-second pulses. With machine running, add egg mixture and process until dough just comes together, about 25 seconds. Turn dough onto sheet of plastic wrap and press into 6-inch disk. Wrap in plastic and refrigerate at least 2 hours.
  2. 2. Unwrap dough; lightly flour large sheet of parchment paper or plastic wrap and place dough in center. Following illustrations 1-9, roll out dough and line tart pan. Freeze dough 30 minutes.
  3. 3. Meanwhile, adjust one oven rack to upper-middle position and other rack to lower-middle position; heat oven to 375 degrees. Place chilled tart shell on cookie sheet; press 12-inch square of foil inside tart shell and fill with metal or ceramic pie weights. Bake on lower rack 30 minutes, rotating halfway through baking time. Carefully remove foil and weights by gathering edges of foil and pulling up and out. Transfer cookie sheet with tart shell to upper rack and continue to bake until shell is golden brown, about 5 minutes longer.

Step-by-Step

Rolling and Fitting the Dough
  • 1. To facilitate rolling, flatten the dough with a rolling pin by rapping it smartly with one hand and spinning the dough with the other.
  • 2. Roll the dough upward from the center and downward from the center with even pressure.
  • 3. Spin the dough one quarter turn, repeating step 2 until dough is 13 inches in diameter (15 inches for an 11-inch tart pan) and 1/8 inch thick. Loosen the dough from the plastic and flour again.
  • 4. Ease the dough over the rolling pin and roll it up loosely. Unroll the dough on top of the tart pan.
  • 5. Lift the edge of the dough with one hand and ease it into the corners of the pan with the other.
  • 6. Press the dough into the fluted sides of the pan, forming a distinct seam along the pan circumference.
  • 7. If some edges are too thin, reinforce the sides by folding the dough back on itself.
  • 8. Run the rolling pin over the top of the tart pan to remove any excess dough.
  • 9. The finished edge should be 1⁄4 inch thick. If it is not, press the dough up over the edge and pinch.

Pastry Cream from Bo Friberg's Professional Pastry Chef.
1 pint (480 ml) whole milk
½ vanilla bean (½ tsp. vanilla extract)
1.5 oz. (30g) corn starch
4 oz. (115g) sugar
¼ tsp. (1g) salt
2 eggs
2 oz. (55g) unsalted butter
Directions:
  1. Place the milk in heavy bottom saucepan.
  2. If using the vanilla beans, split lengthwise and scrape out seeds.
  3. Add seeds and pod halves to milk and bring to boil.
  4. Keeping eye on milk, whisk corn starch, sugar and salt in bowl.
  5. Gradually add eggs, and mix until smooth.
  6. Slowly add 1/3 of hot milk to egg mixture while whisking rapidly.
  7. Pour tempered egg mixture back into remaining milk.
  8. Place over medium heat, and cook stirring constantly until mixture comes to boil and thickens.
  9. Boil for a few seconds longer to make sure the raw starch taste has disappeared.
  10. Remove vanilla bean, rinse and save for another use.
  11. Stir in vanilla extract (if using) and butter until incorporated.
  12. Pour custard into bowl and cover with baking paper.
  13. When cooled, store in refrigerator.

Finally, top with your choice of fresh seasonal fruit. We prefer strawberries (about a pound or maybe 2?). Use clean and dried fruit. I recommend washing and letting air dry before you start the actual recipe. Dust with powdered sugar or make a glaze with strawberry jelly and water. Mix and heat for a little bit until it become spreadable. Drizzle or paint over the fruit. Beautiful, isn't it?


No, that's not me modeling. It's my lovely sister! Print Friendly and PDF

Tuesday, February 8, 2011

Chicken Pot Pie


Best Chicken Pot Pie. Period.

I have made and eaten several varieties of chicken pot pies. But none other, homemade, frozen or restaurant can beat this one! Seriously, it's the best!

Leftover Chicken Pot Pie
adapted from Pioneer Woman 
 

1 pie crust. I use the Pillsbury, pre-made roll out kind. But homemade is always best **see biscuit note
1/2 stick butter
1/2 cup finely diced onion
1/2 cup finely diced carrot
1/2 cup finely diced celery
2 cups leftover chicken OR turkey, light and dark, diced or shredded (or both!)

**I buy a rotisserie chicken from Costco (bcse they are huge) eat it one night for dinner and use the leftover meat for this meal! I've also added a bit of canned chicken when I did not have enough rotisserie.
1/4 cup flour
2 cups low-sodium chicken or turkey broth
splash of white wine (optional....but SO GOOD)
1 cup heavy cream
Frozen peas (optional)
Fresh thyme, chopped
Fresh Parsley, chopped (modified from PW)
salt and pepper to taste

Preheat oven to 400 degrees.

Melt butter in a skillet or dutch oven. Add onion, carrots, and celery, and cook until translucent (a couple of minutes.)
Add turkey and stir. Sprinkle flour over mixture and stir. Cook over medium heat for a couple of minutes, stirring constantly.
Pour in chicken or turkey broth, stirring constantly. Splash in wine (you can leave this out if you’d like.) Pour in cream. (May add frozen peas at this point if you’d like.)
Bring to a slow boil and allow mixture to cook and thicken for a few minutes. Add salt and pepper to taste (do not underseason), and fresh or dried thyme to taste. Do one final taste at the end and add what it needs.
Pour mixture into a casserole dish or deep pie pan.
Roll out crust so that it’s about 1 inch larger than the pan you’re using.
Place the crust on top of the pot pie mixture, and press crust into the sides of the dish. Cut vents in the top of the crust.

**OR, as seen in the photos, if you don't have time to make a crust, use biscuits. Bake in oven for 15-20 (depending on how long your biscuits normally take to bake) minutes then add pre-made biscuits on top and bake for the remaining 15 minutes, or however long it takes for pie to bubble and biscuits to get golden brown.

Bake on a cookie sheet because it will bubble over for 30 minutes or until very golden and bubbly.
Allow to cool for a little bit before serving.
Serve with a large spoon.

This is a great freezer recipe as well! Just prepare until you get to the baking part. Put the raw crust on. Cover with saran wrap and foil. When you are ready to bake, you can thaw it out overnight and bake as usual for 30 minutes. OR bake it frozen until done in the center and bubbly. Probably around 1 - 1 1/2 hours.

Enjoy!


Print Friendly and PDF