Photobucket Photobucket Photobucket Photobucket Photobucket Photobucket
Showing posts sorted by relevance for query teacher. Sort by date Show all posts

Sunday, May 22, 2011

Bittersweet growth


My son has had a momentous week. He completed one year of kindergarten and lost his first tooth. I am starting to feel like Claire on the most recent episode of Modern Family!

After he lost his tooth, which he was so brave about doing, I thought a tooth monster should be made. Together we sewed this little guy.

My proud 6 year old was the head designer and even helped sew it a bit. I found this one after we made ours and he is sad that his did not have more sharp teeth. I also regret not making the pocket mouth a tad bit bigger so the dollar bill doesn't fall out. Oh, and he wanted to add the little cape/wing thing on the back ;0


Along with the last week of kindergarten I gave my son's teacher a little paper sack of mini pencils and a bag of these adorable mini-apple treats from those smart Crafting Chicks. Well, actually, we gave them to her during Teacher Appreciation week, but they would work for thank you's for a great year as well. I used mini nutter-butter cookies because the oreo's were sold out (it was the last day of the sale, I should have known). And they were still cute and tasty!


I tried sewing the wax bag of goodies shut. Sadly though, the "s" in Mrs. didn't come through so I had to pencil that in. haha. I really wanted to re-sew it but I was already running late so that wasn't an option. It's the thought that counts, right? It doesn't have to be perfect.


Sigh, my first born is done with his first year of education. At least he held my hand after his T-ball game on Saturday. He initiated! That melted my heart! I look forward to a great fun filled summer which I hope to blog about this week. Print Friendly and PDF

Monday, May 2, 2011

Teacher Appreciation Week


This week (May 2-6th) is Teacher Appreciation Week. This is the first year I've heard of this as my first child is in Kindergarten. I've found some fabulous ideas on Skip to my Lou. Just click on the photo for the link. These are all easy projects and fairly inexpensive. The hardest part is deciding which one to do!


Print Friendly and PDF

Tuesday, December 13, 2011

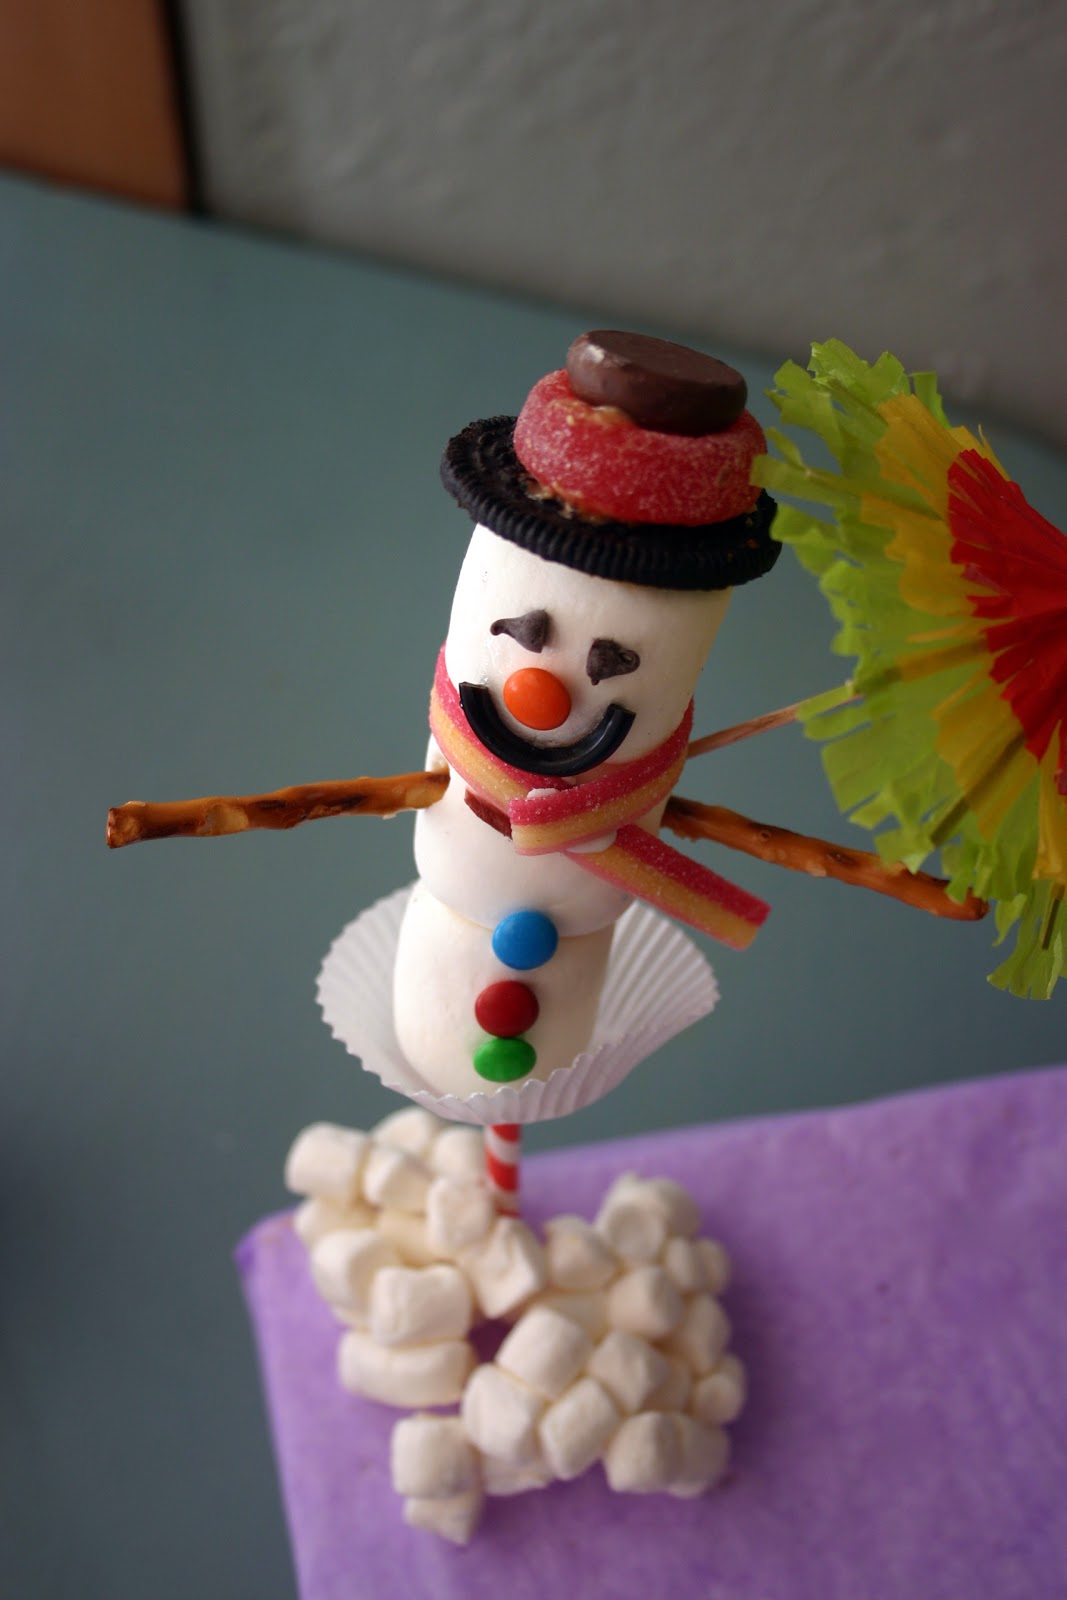
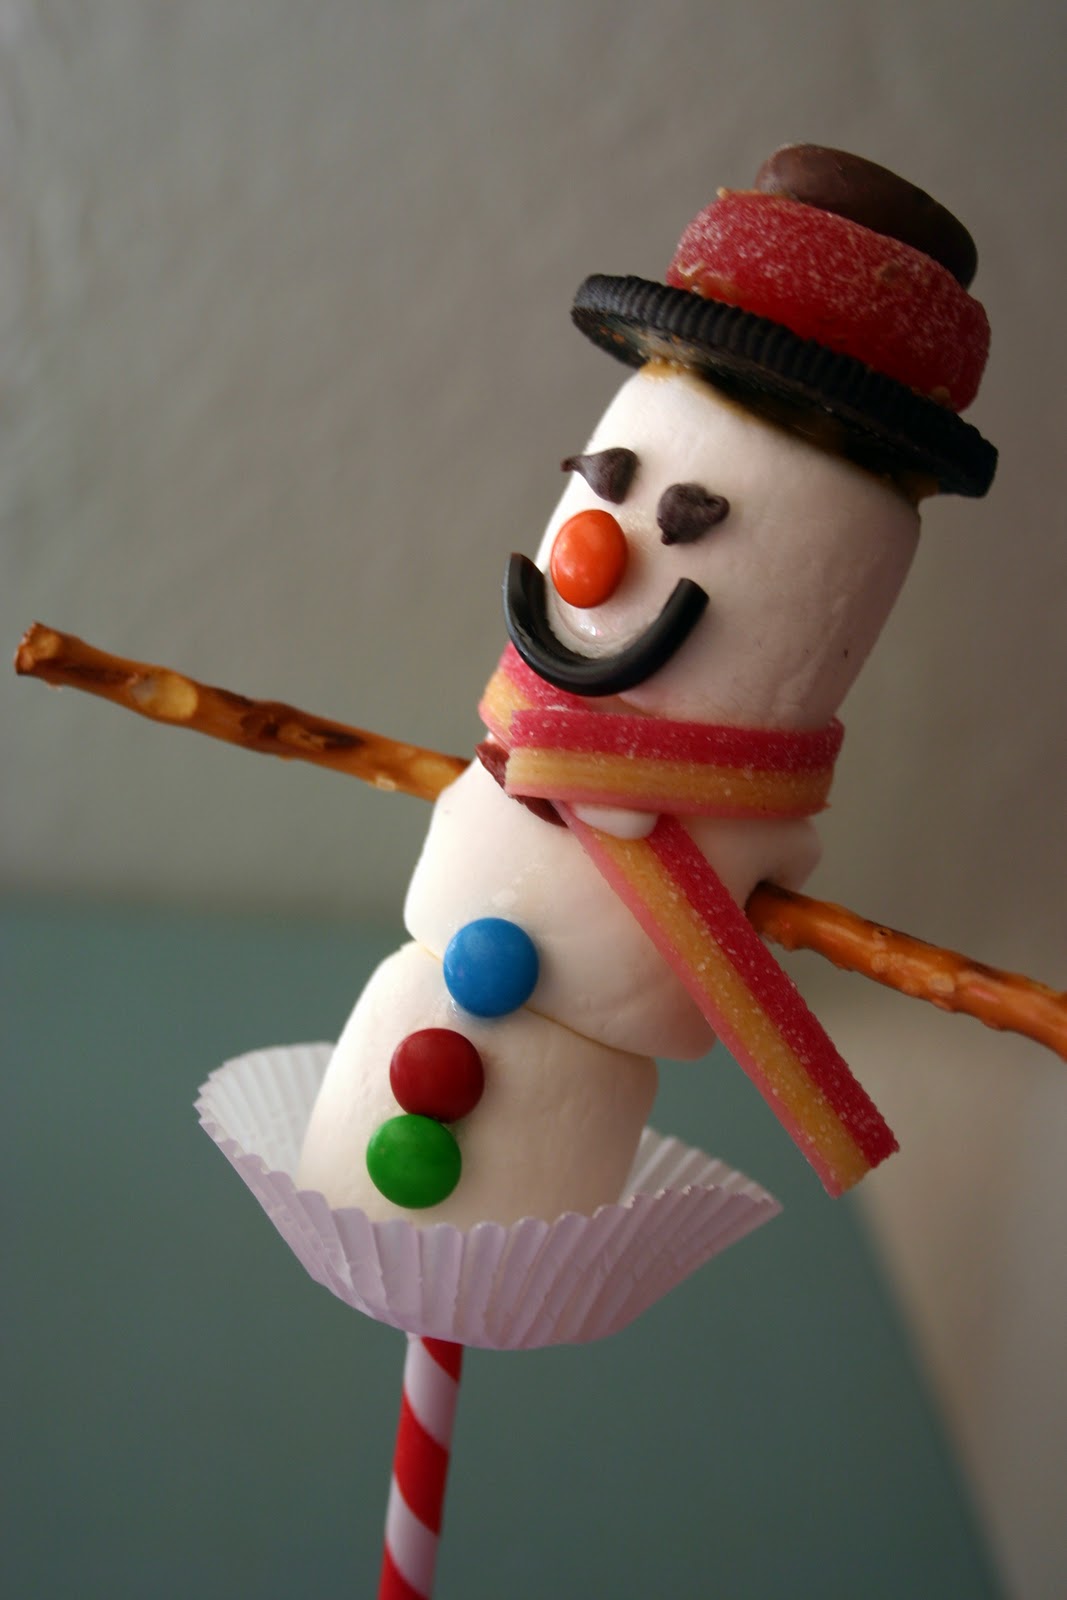
Marshmallow Snowmen (and women)

Are you looking for a simple yet festive craft that doubles as a treat to bring in the festive season? Try making marshmallow snowmen, er.....women, er......people. How about Mary Poppins?


This activity is more for you than for your child, or do it together. It involves a lot of tiny pieces of candy and a lot of sticky stuff like corn syrup and peanut butter which is hard to maneuver. If you don't mind what these look like then go ahead and assemble them together but if you are giving these away as gifts (such as teacher or neighbor gifts...I'm thinking hot chocolate stirrers? Maybe next year....) then I'd just assemble it yourself. They do take a bit of time and patience while drying. I had each girl from our preschool group just tell me which features they wanted and I assembled it for them, allowing them to stick on the buttons and eating the Oreo cream. Once they were dry I put them in a sandwich bag and tied it up so they could take it home!


Materials: 
You probably have most of these things on hand. Just use what you can find in your pantry or leftover Halloween candy!
--6" lollipop stick or straw
--Marshmallows--3 regular sized (mini ones for piles of snowballs or cloud effect!)
--Eyes--mini chocolate chips or mini M&M's
--Buttons--mini M&M's smarties or red hots
--Scarf--lemon heads or fruit roll-ups
--Hat--chocolate ring with large gum drop or other chocolate candy on top of half an Oreo cookie
--Arms--pretzel sticks
--Nose--mini M&M or candy corn
--Mouth--licorice rope or mini chocolate chips
--Corn syrup and/or peanut butter
--Mini cupcake liner, optional


First, you start with three regular sized marshmallows. Using either a 6" lollipop stick or straw (though paper straws are not as strong they are so cute!) slide the mallows on. Next, insert eyes. I used mini chocolate chips (but any small candy item will do). I poked a tiny hole using a toothpick in corn syrup then inserted the chip. For the nose, I used mini M&M's for some and then for others I used cut candy corn. For the mouth there are several options. You can use licorice rope (I used black because I had it leftover from marshmallow spiders) or a row of mini chocolate chips. And for the buttons I used mini M&M's but smarties or red hots would work for these too. For all of the facial and button features, I used a toothpick dipped into corn syrup to stick them on. Corn syrup does take a long time to dry. If you're in a hurry or they are not sticking, just dab on some peanut butter. The arms are just pretzel sticks stuck into a hole that I stabbed with a toothpick first.

The scarf and hats were the trickiest to make stick. With that hats I twisted Oreo's apart, scraped (or let the kids lick if it is for them) off the cream (I had some left over from Halloween) and used one half. Then I bought this Christmas mix that had jelly rings and chocolate covered jelly candies. They were nice and round. I stuck them all together with peanut butter after I realized the corn syrup was just sliding around with the weight. Corn syrup is a good option for kids with allergies or for a glossy look.


The scarves we used were made out of sour air heads. It looked kind of "snowy" with the sugar coating and it was striped. I just cut them down the middle, lengthwise, and got 2 scarves out of each candy. I also thought of using fruit by the foot or fruit roll-ups for a more solid color. The nice thing about fruit roll-ups would have done is stick to each other better. For mine, I tried using corn syrup and peanut butter to make the scarf stick to itself but they wouldn't stick. Finally, I decided to use a peppermint brach nougat candy (I LOVE those things). I just tore off a piece, smashed it and stuck them together. That worked like a charm!

For the Mary Poppins person I used a cookie, then jelly ring then a Hershey kiss (with the tip bit off) inserted into the ring. For fun I got out some cocktail umbrella's to finish off her look.


For the snowman, well, he got a sword.


 Have fun!

Print Friendly and PDF

Sunday, October 2, 2011

Lego Birthday Party: Party Favors

The party favors cost me under $3 each, maybe even less. That's my kind of favor!

Ikea Lego looking boxes: re-purposed. To be honest, they were used. My mom is a school teacher and she used them in her 1st grade classroom for crayon boxes. She didn't need them anymore so I took them, cleaned them up (using W-40 to remove the crayon marks and dish soap) and they're as good as new. FREE.


Coloring Book: Free. This party here gave me a lot of inspiration and info. And I used this website to create a maze and a crossword puzzle. Just copied and pasted, cut to size, covered with spare scrapbook paper, and sewed together. 

The pencil sharpener came from Zurchers (25 cents each), & the mini red pencils I purchased on eBay in bulk.

Lego kit. 30 cents each on Christmas clearance.

Lego Candy. Purchased at my local grocery store for $4.20/lb. I bought about 1 pound. They are so fun because they can actually be played with. Plus, it didn't hurt that they actually taste good (like sweet tarts).


Lego mini-fig crayons. I paid $9 for the mold (I found it on eBay in a set with a lego block mold). The crayons were gathered from our broken collection. Although these took a lot of time it was pleasurable recycling the broken crayons. But the kids had fun helping me make them and they are fun to color with! I won't repeat what others have already explained as far as instructions. If you'd like to make your own, there are some great instructions here.


Check out all the details of this party:
Inspiration Board: Pinterest
Part 2: Decorations
Part 3: Food
Part 4: Games
Part 5: Party Favors
Part 6: Photo Goods
Print Friendly and PDF